Craft - Gatefold Journal

Gatefold journal
This is the project I mentioned last week.
When I first came across gatefold journals on a few crafting channels I watch, I loved the look and idea, but didn’t think I’d be able to pull it off.
Fast forward a few months and wanting to try something different instead of the usual journals I make, I decided to give it a go.
I made sure to take my time with it and plan it out properly before diving in. There weren’t any instructions that I could find, so I tried to visually deconstruct the completed journals as I viewed them.
Granted, it is pretty straightforward, but it took me some time to work out how I was going to make the cover.
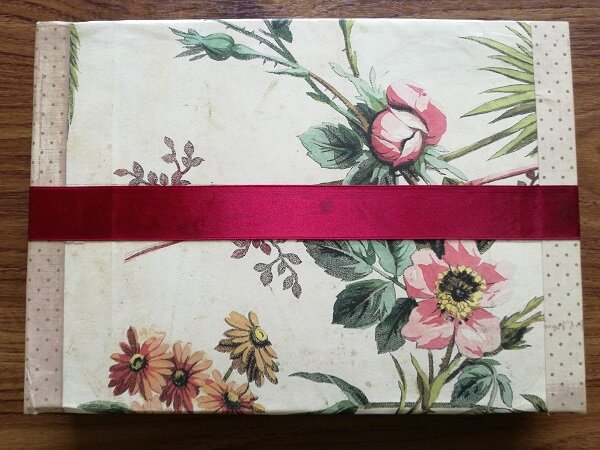
The journal measures 10” x 7.4”, and is about 23” wide when open.
I played around with cereal box covers – what I usually use for my journal covers – but none of them were wide enough as the back piece needed to be twice the usual width. And I wanted to make sure it would be strong enough as well.
Finding a thicker piece of cardboard, I decided to use that for the back piece.
It still wasn’t long enough for the entire cover, so I used a couple of cereal box covers for the right and left front covers.
Hindsight – instead of using the thick piece of cardboard, which I found more difficult to work with, next time I’ll try a couple of cereal box covers glued together.
The journals I’d seen on YouTube had painted covers. I opted to cover mine with paper as I have a few sheets of Anna Griffin wrapping paper I’d bought many moons ago.
Back of the journal
I might attempt painting the next cover of the next gatefold journal I make.
It took longer than usual to gather all the supplies as I needed more papers, not just for the journaling pages but also for the pockets and extra cards and tags.
Although I’d have liked the layout to be different, it makes sense to have the journaling pages on one side and the pocket pages on the other.
The idea is to use the tags, cards and other bits and pieces stored in the pocket pages on the journaling pages. And when they’ve been used up, that frees up space to store more cards and stuff.

Journal pages and pocket pages (rocks holding the covers down on either side)
I found it a bit fiddly sewing the signatures in because of the larger cover, but patience is definitely rewarded. And a big working space helps too.
After sewing the signatures in, I thought it might look nicer if I covered the spines with paper.
For the closure, my original plan had been to attach the ribbon direct to the cardboard cover before gluing the paper on.
But I got carried away and forgot to attach the ribbon first. Ah well…
Both sides have 4 signatures. On the journaling side, I used a mix of patterned paper, tea-dyed paper and book pages.
The pocket pages are made from K&Co ‘Wild Saffron’ cardstock sheets, and a mixture of papers for the pockets, including G45’s ‘Seasons’, which also make up a good number of the cards tucked into the pockets. The flowers are from my own photos.
The part I found most fun was adding the cards and tags to the pockets, including the wide pocket on the inside back cover and on the inside of the front covers.

Inside cover with tuck spaces

Inside back cover with tuck spots

Journal pages

Patterned paper for each signature

Book page as journal page

Journal pages

Filled pocket pages

Pocket pages

The pocket on the left has a tracing paper ‘cover’ which was originally going to be a pocket with the floral paper behind it as a tag. But I liked the look of the paper behind the tracing paper, so glued it on as part of the pocket.

Inside back cover with more tuck spaces
Making a gatefold journal is actually easier than I thought it would be. The trick, I think, is making sure to plan it out in detail.
Given the amount of craft supplies I have, especially the humongous amount of paper, I’m planning on making a couple of themed ones, probably a ‘horse’ one next.
Yet again, I struggled to get my phone camera to record for any length of time. I’ve pieced together some of what I recorded; hope it gives a good enough idea of what the journal looks like.