Organising Craft Supplies & A LorriMarie-Inspired Altered Book

Altered Book cover
As I still haven’t found my writing mojo, I’ve been doing more crafting, trying techniques outside my comfort zone, including using paints as opposed to papers. More on that later…
Although I craft downstairs at the dining table, and I have a few boxes downstairs, most of my craft supplies are upstairs. That’s because I started crafting around the same time I started home-educating the boys, and I wanted their home-ed stuff within easy reach.
It occurred to me as I tidied away after completing my most recent project, all my craft stuff is not in one accessible place. Which means, I tend to return to the same things because they’re easy to get to.
So, I decided the time had come to go through all my craft stash – every single box upstairs and downstairs – and list every single item.
As I did so, I put aside stuff I had never used or no longer use to either get rid of or to go to charity. And that included the ridiculous amount of papers I’ve accumulated over the years. I could wallpaper at least one room with the number of 12”x12” sheets I have!
One unexpected delight was discovering things I’d completely forgotten about. It was like having new craft stuff without forking over any money.
The ‘charity’ pile ended up going to my neighbour’s young daughters who are both avid crafters. Their mum was happy for them to have more craft stuff and that made it easier to part with things because I knew they’d be going to a good home. That resulted in me adding more things to the pile, which was a bonus.
I won’t bore you with the details, but last weekend, with the boys’ help, I finally moved all my craft stuff down to join their brethren already in the dining room.

Craft supplies against one wall.

The drawers on the left have displaced Gordon’s euphonium (in the big black case), so I’ve placed it where he can access it easily
Finally, all the ribbons are together, as are the metal embellishments, the stickers, inks and stamps… Paper scraps are in one place, roughly separated by colour…
I got an affordable set of A4 zipper wallets (£8.99 for a set of 12 on ebay) to store things like 6”x6” paper pads, stickers, book pages, images from magazines, paper bags and tissue paper…

Zipped wallets in box

Tags on zipped wallets so I know what’s where
One thing that’s puzzled me – why do I have so many buttons?
I must have bought a job lot way back when for… I don’t remember what.
Anyway, I sorted them by colour into separate containers and I guess I’ll use them in journals and scrapbooks.

Buttons in containers

Buttons separated by colour
Having my craft stash in one place means there’s no longer any excuse for not crafting regularly.
Going back to the outside-my-comfort-zone techniques I mentioned at the beginning of this post, I used them in an altered book project after watching some of LorriMarie Jenkins videos on YouTube.
One thing I didn’t want to do was to buy anything for this project. That meant I had to find ways around how LorriMarie did certain things.
My first attempt is in no way comparable to LorriMarie’s lovely works of art. Even though I’m more than a little shy about putting this on display, it seems pointless to make things and then hide them away.
I had planned on making a video, explaining how I’d altered each page, but my old phone was acting up and only recording in fits and starts. So, I ended up recording a quick flip-through, which is at the end of this post.
As I didn’t want to make this blog post too, too long, I haven’t explained each and every page, only a selection.
Starting with the cover – I like the colour and texture of the book cover and didn’t want to paint over or cover it completely.

Altered book cover

Spine of book
I cut out the rectangle, glued the image to the first page of the book then glued the page to the cover.
The piece of music paper covering the spine has been painted with Ecoline ‘Burnt Sienna’ liquid ink as has the flower-shaped piece. A couple of Prima flowers finish the look.
I also used Stickles glitter glue along the edge of the image and on the flowers.
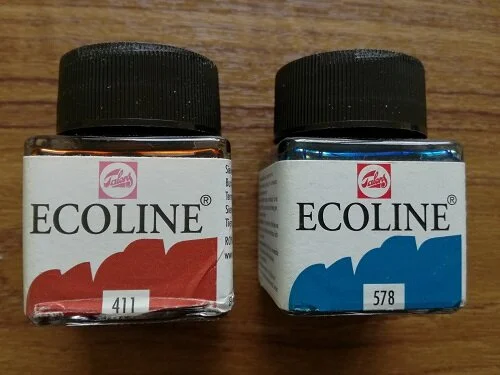
Ecoline liquid ink, Burnt Sienna and Sky Blue
This is the first double page layout. After covering both pages with gesso, I closed the pages while the gesso was still wet and opened them again for the crackle effect.

Watercolour on gessoed page
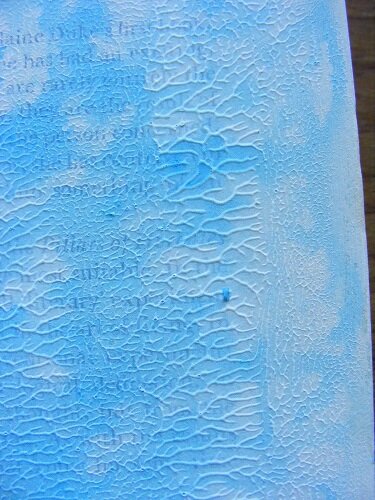
Close-up of crackle effect of gesso
Once it was dry, I went over it with watercolours – blue first, then red.
When that was dry, I glued on some scraps before attaching the final image, which was from a magazine advert.

Altered page
I like the crackle effect so much, I used it a few times in the book, including on this page on the left, which is not part of the book but sewn in after being altered with gesso and paint. The young woman is from another magazine advert. The page opens…

Altered page sewn onto book
… to reveal these 2 pages covered with a purple napkin on the right and the white lining of the napkin on the left. I went over the purple with white acrylic paint and the white layer with brown paint.

Altered pages covered with napkin
I glued squares of paper to the page on the right then went over them with green acrylic paint in a swirly motion. I like the effect, so wanted to leave much of the page visible. This image was from an old fashion book.

Altered pocket page on left, page on right altered with acrylic paint
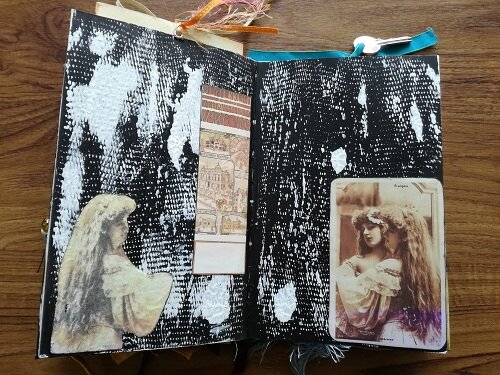
For this layout, I first covered the pages with scraps of black and patterned paper then scraps of white napkin lining. Using Mod Podge, I glued the scraps to the pages by plonking them down and going over with the brush, letting them bunch up here and there to create an uneven surface.
I then randomly applied brown acrylic paint before adding the images.
The image on the right is one I put together myself digitally using images I already have.
I digitally altered the one on the left, which is of the house my family lived in when I was born.
And the leaf is an actual leaf from the horse field.

Page altered with white napkin and paint
After covering these 2 pages with black paint and letting it dry, I dotted white gesso on the pages. Putting a piece of paper between the pages, I did the open-close thing for the crackle effect on the white gesso.
The image on the right and the long piece in the middle are from a vintage collection I have.
I printed up another copy of the same image for the left but covered the front with a light coating of gesso and left it to dry. Once dry, I dampened my finger and very carefully rubbed the paper (back of the image) off the gesso. And the result is the image on the left.
I’ve done that technique before using Mod Podge but using gesso gives the paper an interesting texture; the closest description I can think of is sort of vinyl-leather.
Page altered with black paint and white gesso
This is the pop-up page layout, which took me a couple of attempts to get right; it was a bit hit-and-miss getting the measurements for the pop-up image right, so it would pop up.
I first coloured the pages with Ecoline ‘Sky Blue’ liquid ink then glued on paper scraps and images. The images on the top half of both pages are part of the magazine advert I used for the first layout.
The middle pages which have been torn to make them narrower, where the cards are slipped in, are only glued down on the top and bottom.
The pop-up bit is a piece of card wide enough on either side to be slipped under and attached with… I’m pretty sure I used double-sided tape.

Pop-up page layout
LorriMarie explains and demonstrates clearly in this video: https://youtu.be/_1ktnWK10kY?t=950
The images for the cards are mostly from the ‘Graphics Fairy’.
The next layout is the penultimate one and, to be totally honest, I was getting to the point where I just wanted to finish the book.
So, this layout is quite straightforward – music paper to cover the page then pink watercolour.
The image on the right is from the vintage collection I have, and is a pocket, which ‘opens’ on the top.
I thought the little girl on the left (Graphics Fairy) would like a pretty pink skirt, so I made her one, albeit a little clumsily, from a couple of pieces of pink fabric.

Altered page using fabric
For the last layout, I first glued together the last pages in the book and cut out the middle to make a recess – the number of pages glued down depends on how deep you want the recess. I didn’t remove the pages completely, leaving the left side still attached, so it forms a ‘door’.
LorriMarie has a handy tip for gluing together a wodge of pages.
Instead of applying glue to each and every page, hold the pages together and apply the glue with a brush along the outside edges, letting the glue seep in between the pages.
Then place the closed book – make sure you put something like baking parchment between the glued pages and the rest of the book as protection – under a heavy book. LorriMarie tends to sit on hers, which makes me laugh because she’s a slim lady!
I then covered the door with a napkin piece and attached a button as a ‘handle’
The image of the woman is from Public Domain Pictures and the flowers are from Prima.

Layout with a cut-out door…

… which opens to reveal image of woman and birdcage
And that is my first ‘outside my comfort zone’ altered book. I’m not sure if I’ll do another one like it as I really struggled to think up ways of altering the pages without resorting to paper.
Also, it took longer to complete because each time I used paint, I had to wait for it to dry. Patience is not one of my strong points.
Next week, I’ll blog about the project I finished a couple of weeks ago.